Install Docker on Windows Using WSL2 Ubuntu
1. What is WSL2?
Windows Subsystem for Linux (WSL) is a full Linux kernel built by Microsoft that allows you to run a Linux environment on Windows without the need for a separate virtual machine. Use WSL to install and run various Linux distributions, such as Ubuntu, Debian, etc.
2. Install WSL
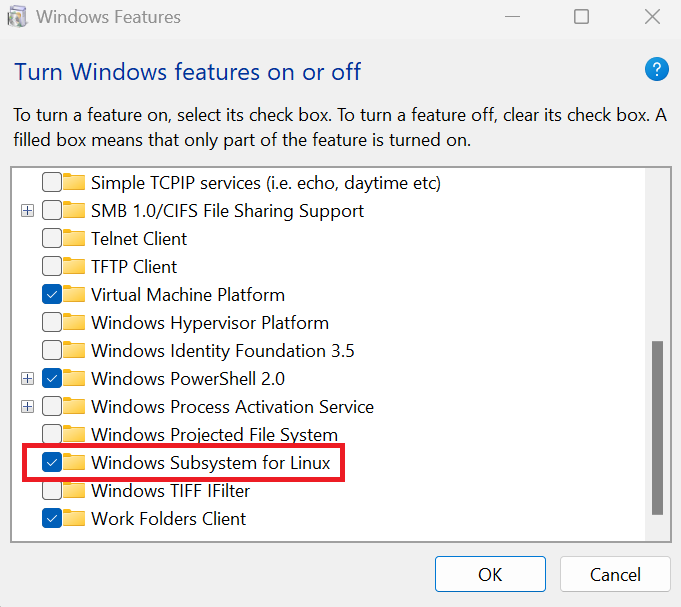
a. Open ‘Turn Windows features on or off’
b. Enable ‘Windows Subsystem for Linux’
c. Run the command ‘WSL –update’ to update the WSL to the latest version.
d. Run the command ‘WSL –shutdown’ to shutdown all the instances.
3. List the Linux distributions
a. Run the command ‘WSL –list’ to view the existing distributions.
b. Run the command ‘WSL –list –online’ to view the list of valid Linux distributions that can be installed.
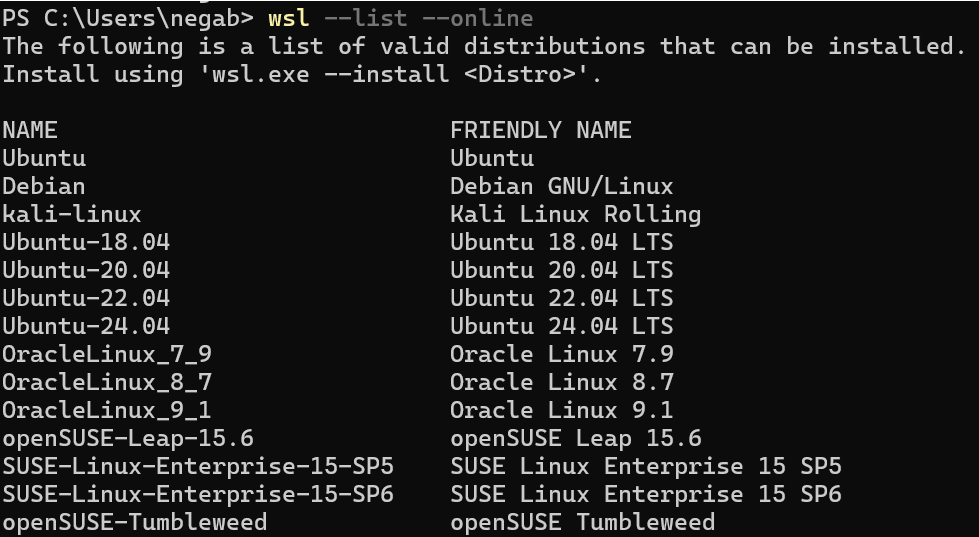
4. Install Ubuntu
a. Run the command ‘WSL –install -d ubuntu’ to install the Ubuntu Linux distribution.
b. After Ubuntu installation, setup your username and password.
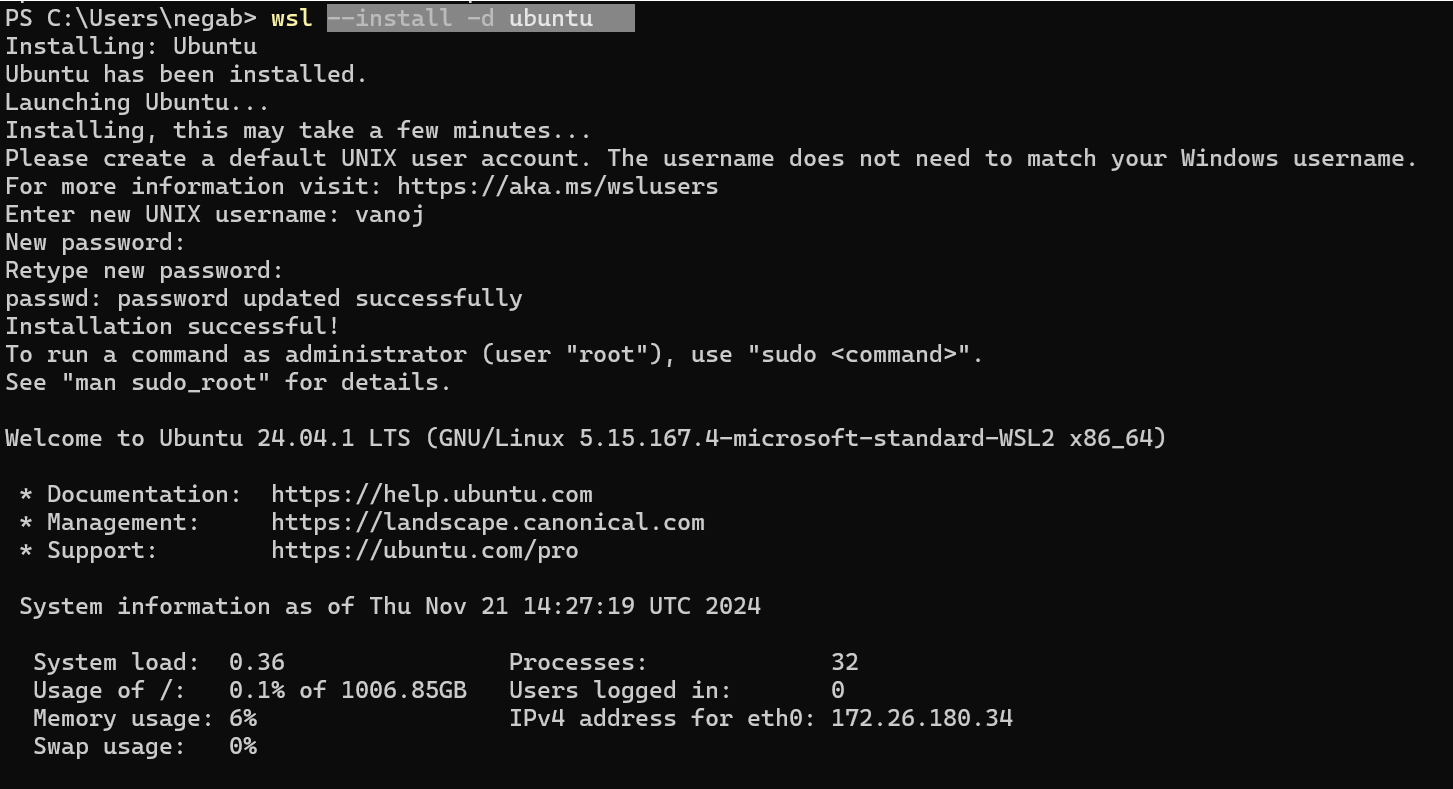
b. Run the command ‘exit’ to exit the WSL and close the terminal.
c. Reopen the terminal and choose the Ubuntu
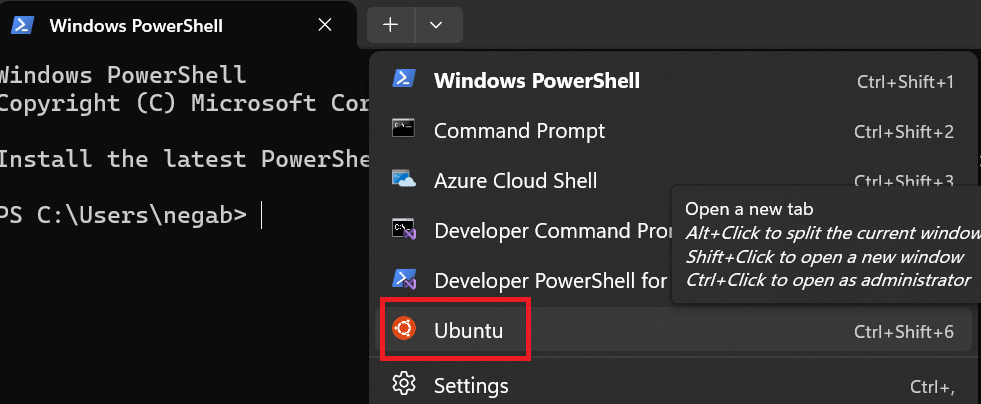
d. You can also switch to Ubuntu from the command prompt or powershell by entering the command ‘WSL’, which will take you to the default distribution, i.e., Ubuntu here in our case.
5. Install Docker
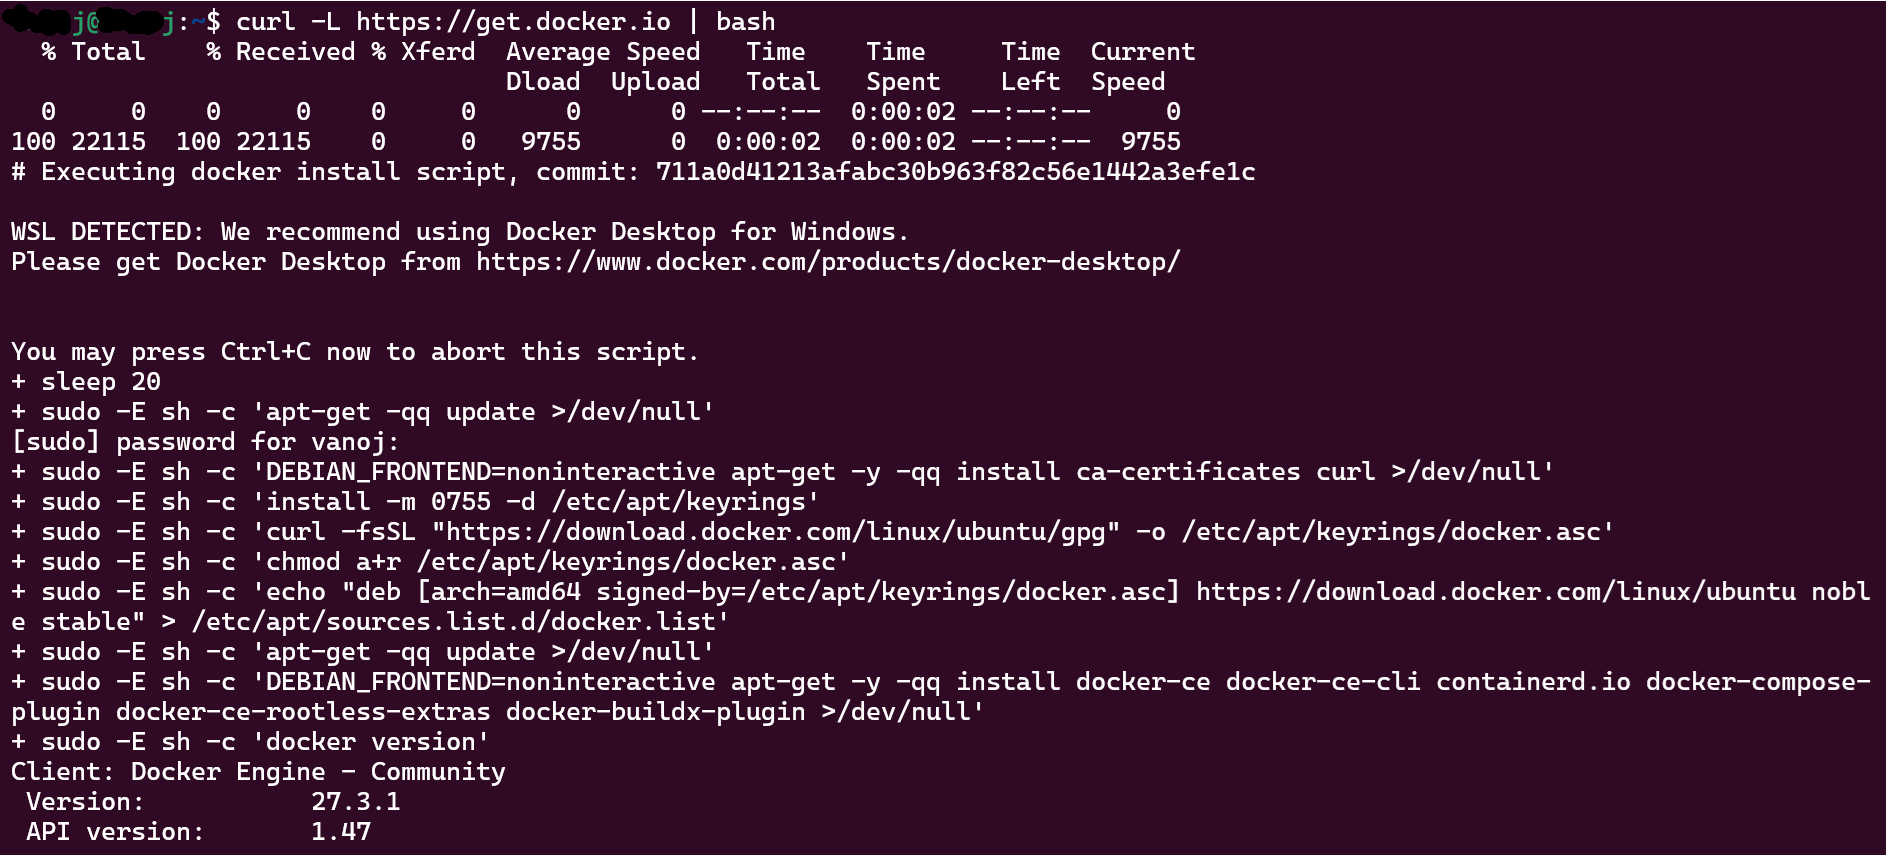
a. Run the command ‘curl -L https://get.docker.io | bash’ to get the docker using CURL.
b. Enter your password to proceed with installing the Docker.
6. Docker start
a. Run the command ‘sudo service docker start’
7. List of Docker images
a. Run the command ‘docker ps’. You may receive the following error:

b. You may need the Ubuntu user for the network group.
c. Run the command ‘sudo usermod -aG docker $USER’
d. Run the command ‘docker ps’ again to view the list of Docker images.

8. Docker run
a. Run the command ‘docker run hello-world’. This command will pull the ‘Hello World’ image from the Docker hub and run the image in local.


Leave a comment